This tutorial is going to explain how to separate shader groups on a custom model.
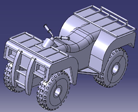
First extract the model you are going to be replacing, with entity(I'm using 1.4 for this tutorial)

Every model in Halo 2 has at least one or more shaders. When you extract a model there will be mesh groups, these groups will identify the shader grouping. So open the extracted model in a modeling application(I will be using Misfit model 3d for this)


This is the group window:

The bitmap that the group is dependent on is usually close or exactly the same as the shaders name that it represents.
There are two groups for each shader. The bottom group is the one that is the actual shader.
So it goes(Red is the used one)
0
0
1
1
2
2

Merge your model into the extracted model.


Select the original mesh that you extracted form halo and hide it.


After that select part of the mesh you want as a different shader from the rest.

Once selected you can add it to a group, to do that click the add to group button in the grouping menu and all the selected faces will be added to that group.

After that, unhide the mesh you hid before. The reason we had to hide it is because if you delete it the groups that are there with it are also deleted.

Then reselect the mesh and delete it.

Then save and inject back into your map and enjoy a model with separated shaders